
Three-coat stucco is one of the oldest exterior systems still in wide use, and when it is done right it will outlast almost everything else on the house. The catch is that every layer depends on the one before it, and most stucco failures we get called to fix trace back to a shortcut in a layer nobody can see anymore. Here is the whole process, in order, the way we run it on jobs across Southern Utah.
Everything starts with the weather-resistive barrier. Over the wall sheathing we install two layers of Grade D building paper or an equivalent house wrap. Two layers is not overkill: the outer layer takes the abuse of the wet scratch coat bonding against it, and the inner layer stays intact as the true drainage plane. Water that ever gets past the stucco runs down this plane and exits at the bottom of the wall.
That exit point is the weep screed, a metal strip at the base of the wall that gives moisture a way out and sets the clean bottom edge of the stucco. Along with it goes the rest of the trim package: casing bead around windows and doors, corner aid on outside corners, and flashing integrated with the paper so water always laps over, never behind. This flashing work is tedious and invisible in the finished wall, and it is the single most important part of the job.
Next comes lath, the skeleton the plaster grips. We fasten galvanized expanded metal lath or woven wire through the paper into the framing, furred out slightly so the first coat can push through and lock around it. Sloppy lath, loose fasteners, or lath laid flat against the paper gives you a weak wall no matter how good the plastering is.
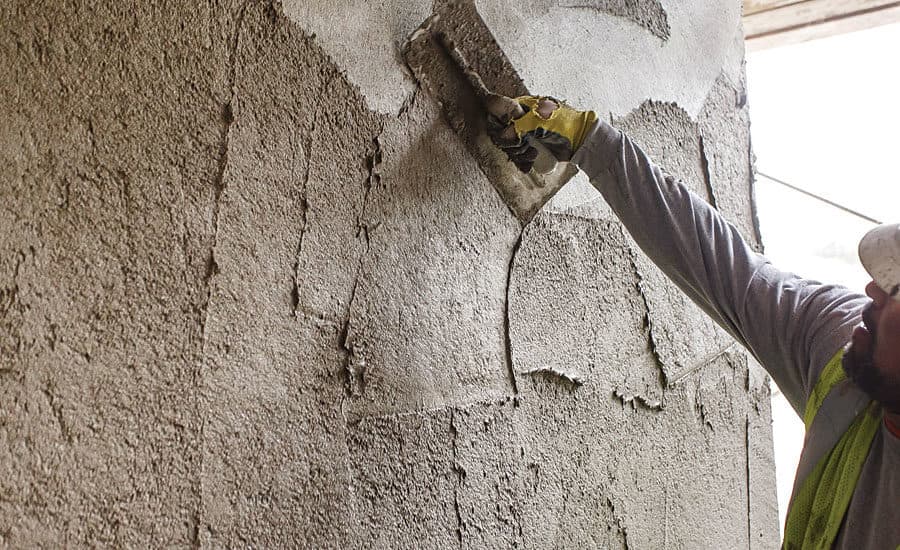
Then the first plaster coat, the scratch coat. This is a cement, sand, and water mix troweled on at roughly three-eighths of an inch, pressed firmly so it keys through the lath. Before it sets, we rake horizontal grooves across the whole surface with a scarifier. Those scratches are not decoration; they are the mechanical grip for the next coat.
Here is where the desert changes the job. Cement does not dry to gain strength, it cures, which is a chemical reaction that needs water. In St. George in summer, a fresh scratch coat can lose its moisture to the air before the reaction finishes, leaving weak, dusty, crack-prone plaster. So we mist-cure: lightly fogging the walls with water, typically a couple of times a day for the first day or two, to keep the reaction fed. On hot walls in July, we also plan plastering for mornings and shaded elevations.
After the scratch coat cures, the brown coat goes on, another cement coat at about the same thickness that brings the wall to roughly three-quarters of an inch total. This is the flattening coat. We rod and float it to a straight, uniform plane, because every hump or hollow left here shows through the finish. A good brown coat is the difference between a wall that looks crisp in raking evening light and one that looks lumpy.
Control joints get set before or during the brown coat stage on larger walls. Stucco is going to shrink slightly as it cures and then move with our temperature swings forever, so we give it planned relief lines instead of letting it pick random crack paths. Codes and good practice cap panel sizes; on a big blank wall, those joints are what keeps the field crack-free.
Now the wall waits, and this is the step schedules always want to squeeze. The brown coat needs to cure and do its initial shrinking before the finish goes on, seven days as a floor and more when we can get it. Finish applied over a green brown coat inherits every shrinkage crack that was still coming. When a stucco job on a fast-track schedule cracks early, this skipped wait is the usual reason.
The finish coat is the part you actually see, a thin layer around an eighth of an inch that carries the color and texture. It comes in two families: traditional cement finish with integral color, and acrylic finish, which is more flexible, more fade-resistant under our UV, and more consistent in color. Texture is applied by hand, whether that is a sand float, a lace, a dash, or a smooth trowel, and this is where a crew's craftsmanship is on full display.
Weather rules the finish day. We do not apply finish in direct summer sun on a hot wall if we can avoid it, because it flashes off too fast and shows lap marks and color variation. We also watch for rain and for freezing nights in the Cedar City winter, since fresh cement and frost do not mix. A good crew reads the forecast as carefully as the plans.
So what is the total timeline? For a typical house, figure lath and paper in a day or two, scratch coat, a short cure, brown coat, then the seven-day-plus brown coat cure, then finish. End to end that is usually two to three weeks of calendar time, with actual crew days scattered through it. The waiting is not dead time, it is the process working.
If you are a homeowner watching this happen on your house, the things worth checking are simple: two layers of paper, flashing at every opening, scratched first coat, misting during hot-weather cures, and a real wait before finish. We have run this exact sequence on homes and commercial work across Southern Utah since 2001, and the walls we plastered twenty years ago are the proof it works. If you have a project coming up, we are happy to walk you through how it applies to your plans.
How long does three-coat stucco take to cure?
The scratch coat needs about 48 hours of moist curing before the brown coat, and the brown coat should cure at least seven days before the finish coat goes on. Full strength develops over about 28 days. In desert heat, misting the walls during the first days is essential so the cement cures instead of drying out.
Can stucco be applied in hot weather?
Yes, but the crew has to manage it. That means plastering shaded elevations and mornings when possible, misting cured coats to keep them hydrated, and avoiding finish coats on sun-baked walls where the material dries too fast and shows lap marks. Summer stucco in St. George is routine for crews who plan around the heat.
What are the grooves cut into new stucco walls?
Those are control joints. Stucco shrinks slightly as it cures and moves with temperature swings, so control joints divide big walls into panels and give that movement a planned place to happen. Without them, large wall areas pick their own crack paths. They are a sign of a properly detailed job, not a defect.